
Getting Started
How to create a Vlexor account, walk through the onboarding wizard, and send the Command Engine your first editing command.
What Vlexor is
Vlexor is an AI video editor built for long-form creators, not a traditional timeline you learn to operate. Instead of manually cutting clip by clip, you show Vlexor a video whose editing style you want — a fast-paced YouTube vlog, a cinematic trailer, a calm explainer Short — and it studies that reference's pacing, color, captions, and cut rhythm, then applies the same style to your own footage once you describe an edit in plain language. The web app at vlexor.app is where you create an account, build projects, and hand instructions to the Command Engine; the actual video encoding — the real, sustained work of reading and re-rendering your footage — runs locally inside a separate desktop application, so the web app is best understood as your planning and account surface rather than a video processor in its own right. Both the web app and the desktop app are fully bilingual, with Arabic treated as a first-class language and right-to-left layout throughout, not a translated afterthought.
Creating an account
Every new user starts on the sign-up tab of the auth card, reachable at /sign-up or by switching tabs on /sign-in. Signing up with email and password asks for your full name, email, and a password of at least six characters; behind the scenes, Vlexor tries to create your account already confirmed and sign you in immediately so there's no confirmation email to wait on, but it falls back automatically to a standard confirmation email if that fast path isn't available in the environment you're on — in that case you'll see a notice to check your inbox and confirm before your first login. Instead of a password, you can also continue with Google, X, or Slack; each goes through Supabase's OAuth flow and returns you to Vlexor with a session already established, no separate confirmation step either way. What happens immediately after differs by method: finishing email-and-password sign-up drops you straight into the three-step onboarding wizard, since that wizard is the only way a project actually gets created. Continuing with Google, X, or Slack instead — whether it's your very first sign-in or your hundredth — takes you directly to your workspace at Home, without automatically opening the wizard. If you sign in that way and don't see any projects yet, the "+ New project" button on the Projects page opens the same onboarding flow described below. Creating an account itself is always free and never asks for a credit card; you can reach the composer and try the Command Engine before choosing a paid plan.
- Email and password — full name, email, and a password of six characters or more
- Continue with Google, X, or Slack — no password to set, and no confirmation email either way
- Email sign-up leads straight into onboarding; OAuth sign-in lands you on Home instead, first time or not
Signing in, and resetting a forgotten password
Returning users use the same auth card on its Login tab (or go straight to /sign-in), with email and password or any of the three OAuth options — logging in this way always lands on Home at /app, never the onboarding wizard. If you've forgotten your password, the "Forgot password?" link under the password field opens a dedicated page where you enter your email; Vlexor always responds the same way whether or not that address actually has an account, so the form can't be used to check which emails are registered, and if an account does exist, a reset email follows a moment later. Clicking that email's link routes you back through the same callback route that handles OAuth sign-ins, which exchanges it for a real, temporary session tied specifically to the reset action. From there, the reset-password page lets you set a new password directly, with a confirmation field so a typo doesn't lock you out — saving it signs you into your account and sends you straight to Home.
The onboarding wizard, step 1: show Vlexor a style
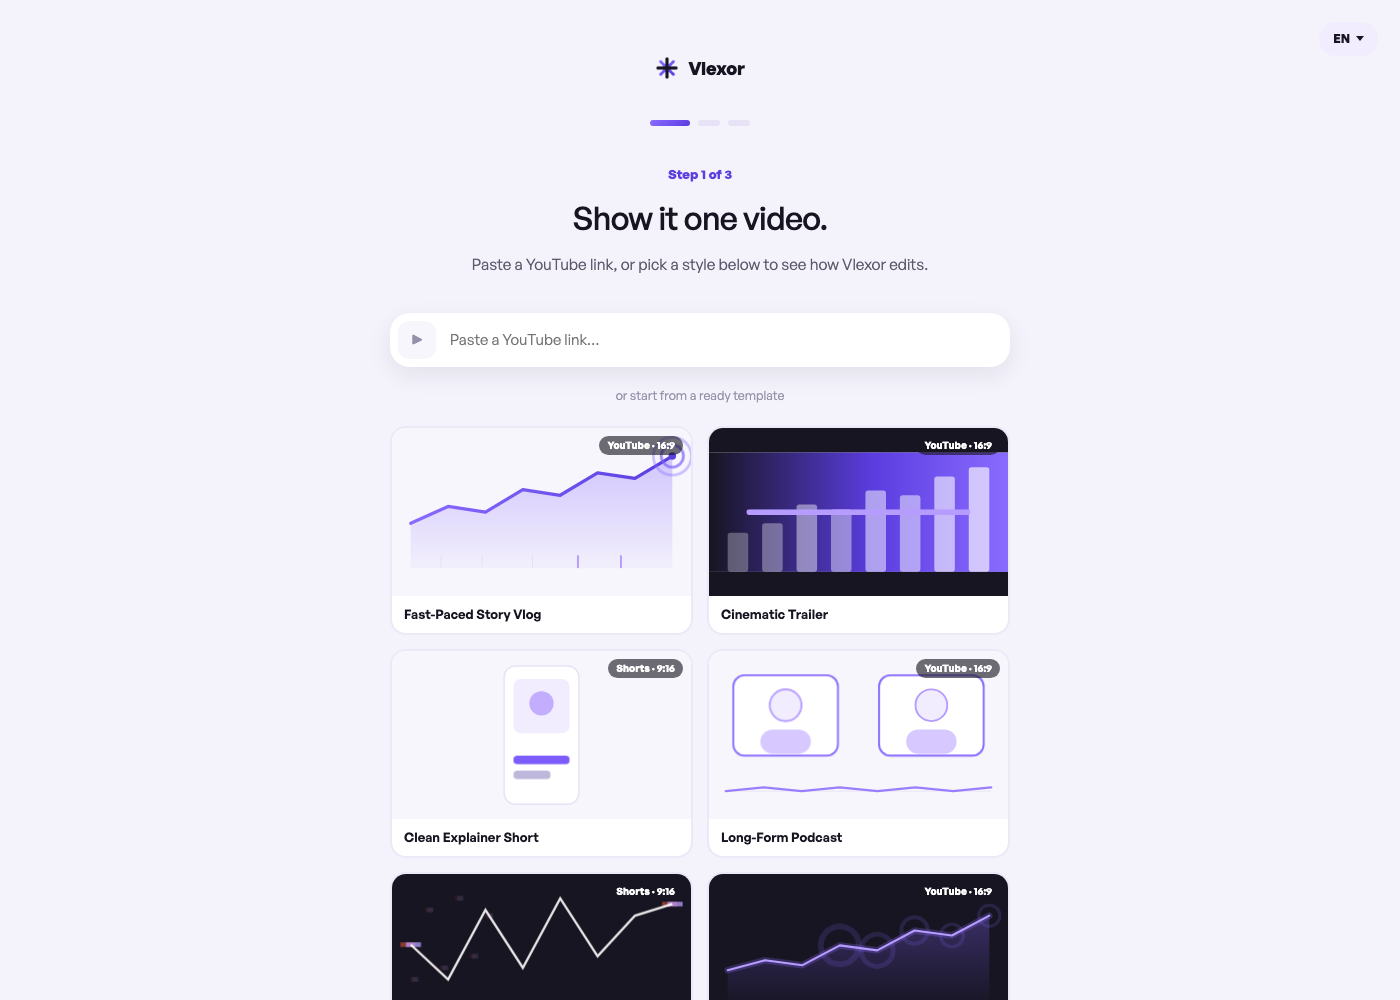
Every project — whether it's the very first one right after signing up, or your fifth — starts on the same three-step wizard at /onboarding. The first step asks you to show Vlexor a style in one of two ways: paste a YouTube link into the field at the top, or skip straight to picking one of fifteen ready-made style templates below it. Choosing one clears the other, since a project starts from exactly one style source, not both at once. Each template carries real, hand-tuned pacing rules — average shot length, cut frequency, silence trimming, zoom intensity, caption look, and an energy curve — rather than being a cosmetic label, and each targets a specific output format. If you paste a YouTube link instead, Vlexor starts analyzing it in the background — this is the Pacing Clone flow — the moment you press Continue, so the result is usually ready by the time you reach step three.
- Fast-Paced Story Vlog — punchy jump cuts, punch-in zooms, and kinetic captions, targeting YouTube 16:9
- Cinematic Trailer — dramatic reveals and an orchestral-swell pacing curve with a cinematic color grade, targeting YouTube 16:9
- Clean Explainer Short — calm narration, legible captions, and minimal cuts, targeting Shorts 9:16
- Long-Form Podcast — steady multi-cam pacing with tight silence removal, targeting YouTube 16:9
- …and eleven more, from Glitch / Broken Reality to Emotive Story — see the style learning guide for the full list
Step 2: name your project and add footage
The second step asks for a project name — type anything you like, or leave it blank and Vlexor names it "Untitled project" for you when you finish. Below that is a footage drop zone: click it to browse for a file or drag one straight in, and it accepts MP4 and MOV files up to 4K. Attaching footage here is entirely optional, exactly as the hint text under the drop zone says, so you can skip it and add your real footage later from inside the editor. What this step actually saves when you reach the end of the wizard is your project's name and chosen style — real footage import, transcription, and rendering are desktop-app capabilities, so don't worry if the file you dropped here doesn't reappear anywhere else; that's expected, not a bug.
Step 3: Vlexor learns the style
If you pasted a reference video in step 1, step three shows a live checklist while the Pacing Clone analysis that started back then finishes, with each row appearing as it completes: cut pacing extracted, color profile matched, caption rhythm learned, and music sync mapped. If that analysis fails, Vlexor doesn't block you — it explains that it couldn't analyze the reference and lets you continue anyway with a default style, since you can always attach a reference later from the editor. If you picked a template instead, there's no analysis to wait for; this step just shows a summary card with your project name and the style you chose. Either way, pressing "Start editing" at the bottom does two things at once: your chosen style — the template's saved pacing rules, or the reference you pasted — becomes your project's style profile, and a project row is created under your account with that name and style label, which is what finally takes you into the editor at your new project's own URL.
- Cut pacing extracted
- Color profile matched
- Caption rhythm learned
- Music sync mapped
Creating more projects later
There's exactly one way to create a project in Vlexor, and it's the wizard described above — there's no separate quick-create shortcut anywhere else in the app. From the Projects page, reachable from the left sidebar alongside Home and Settings, the "+ New project" button opens that same three-step wizard fresh, whatever project you had open before. Home, the page you land on right after logging in, doubles as your composer and a shortlist of your four most recently updated projects, letting you jump straight back into any of them; Projects lists everything you've ever created, filterable by draft or published status, with its own search box. Opening a specific project, from either list or its own URL, loads its transcript panel automatically once the desktop app has generated one for it — from there you can delete individual words to cut the matching clip, in addition to typing commands in the composer.
- Home (/app) — the composer, plus your four most recently updated projects
- Projects (/dashboard) — every project you've created, with the "+ New project" button and status filters
Sending your first command
Once you're on Home, the composer at the top is where you actually talk to Vlexor: a text box inviting you to paste a YouTube link, upload footage, or describe the edit you want, sitting above two small pill fields and a send button. The Effects field opens a grid of pickable additions — a zoom/punch-in, three caption looks (clean, kinetic, glass), six color grades (cinematic, vintage, vibrant, noir, warm, cool), and three transition kinds (crossfade, wipe, slide); picking a second grade or a second transition swaps out whichever one you'd already picked, since those are alternate looks for the same step rather than stackable effects. The Reference field lets you paste a YouTube link or a written style description to analyze on the spot — the same Pacing Clone flow from onboarding — and a template gallery just below the composer reproduces the same four style templates from onboarding, so you can apply one to your next command without leaving Home. As you type at least a few characters, Vlexor's Intent Prediction quietly guesses which effects your wording implies and shows them under the text box as a "Will apply:" preview, at no cost and before you've sent anything. A first command doesn't need to be complicated — something like "cut the first 5 seconds and add kinetic captions" is enough to produce a real, multi-step plan. Pressing the send button, or Cmd+Enter (Ctrl+Enter on Windows), sends your typed text along with any picked effects and reference to the Command Engine as one combined instruction. A short loading state follows, then a dark summary card appears: a one-line description of what Vlexor understood, which model produced the plan, and the plan itself as a numbered list of steps — keep or cut ranges, a zoom, a caption, a color grade, a transition — each with its timing, followed by the output format it targeted. That card is a preview of the AI-generated edit plan, not a finished video: turning it into an actual rendered file is the desktop app's job, running locally on your own footage rather than in the browser.
- Effects — zoom/punch-in, three caption styles, six color grades, and three transition kinds; grades and transitions are exclusive picks within their own group
- Reference — re-run Pacing Clone on a new link or description, or apply one of the fifteen style templates
- Send with the button, or Cmd/Ctrl+Enter from the keyboard
What to read next
This guide covers the path from an empty account to your first AI-generated edit plan; two guides pick up right where it leaves off. For everything the composer, the Effects and Reference fields, and the Command Engine can do beyond a first command — multi-step instructions, transcript-based editing by deleting words, and how a plan actually becomes a rendered file — see the guide on editing with commands. For how Vlexor keeps learning your pacing, caption, and zoom preferences automatically after onboarding, and how to turn that off in Settings, see the guide on style learning.